为 LeaveIt 主题添加阅读进度条
3 min read
{{< notice info “Obsolete” >}} 本站目前使用的主题是 zzo {{< /notice >}}
前面写了篇文章中提到了如何给 Hexo 主题添加阅读进度条,如今将博客换到 Hugo + LeaveIt 后一直想把这个特性移植过来,但因为博主太懒了,这个计划就一直被拖到了现在,直到今天终于搞定了。效果就像你现在看到的这样 (就上面的那条粉色的进度条)。还是挺好看的吧?
理论上所有 Hugo 博客都可以通过相似的方法添加阅读进度条。
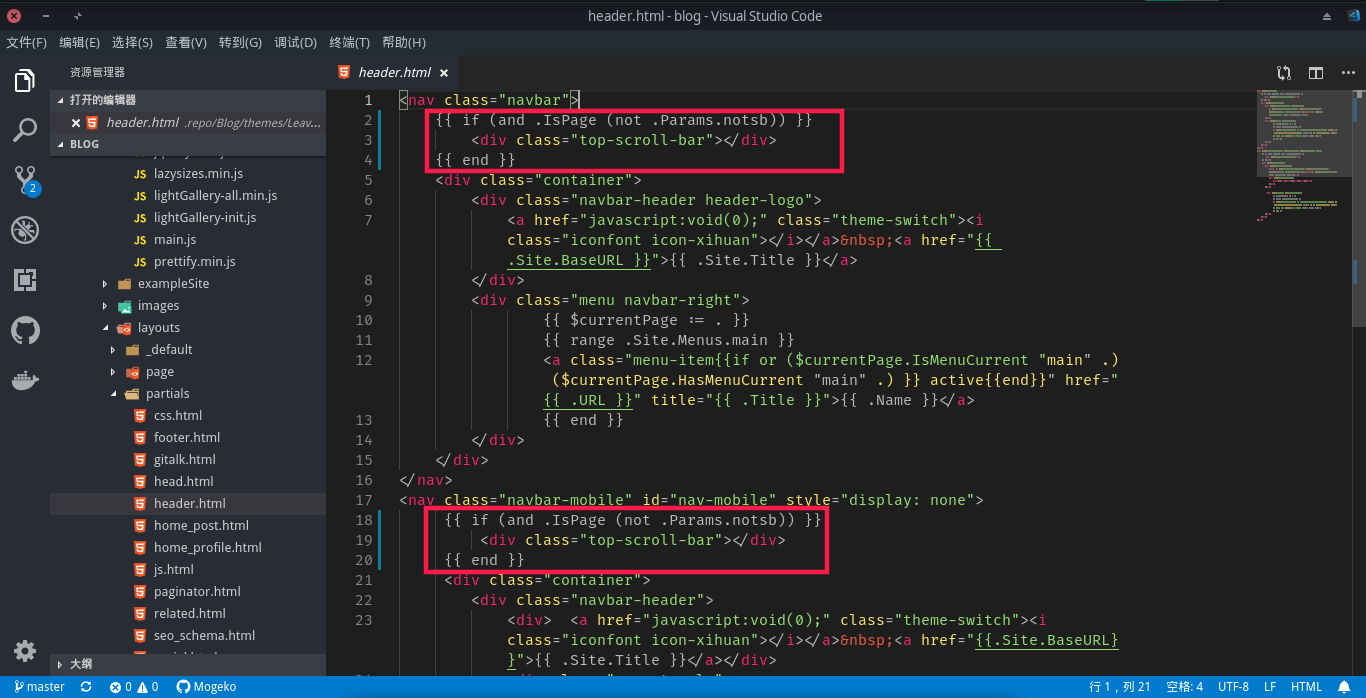
首先将这一段代码插入到 header 的模板中
这个模板在不同的主题中可能有所不同,LeaveIt 的 header 在 /layouts/partials/header.html
{{ if (and .IsPage (not .Params.notsb)) }}
<div class="top-scroll-bar"></div>
{{ end }}
分别插入到第 2 行和第 16 行,也就是如图所示的位置
然后在/assets/css/_custom.scss 文件中为我们的进度条添加样式
// 顶部阅读进度条
.top-scroll-bar {
  position: fixed;
  top: 0;
  left: 0;
  z-index: 9999;
  display: none;
  width: 0;
  height: 3px;
  background: #ef3982;
}
再然后,新建一个 js脚本 文件 /assets/js/_custom.js,来控制我们的进度条。
// ==============================
// Custom JavaScript
// ==============================

// 顶部阅读进度条
$(document).ready(function () {
  $(window).scroll(function () {
    $(".top-scroll-bar").attr(
      "style",
      "width: " +
        ($(this).scrollTop() / ($(document).height() - $(this).height())) *
          100 +
        "%; display: block;",
    );
  });
});
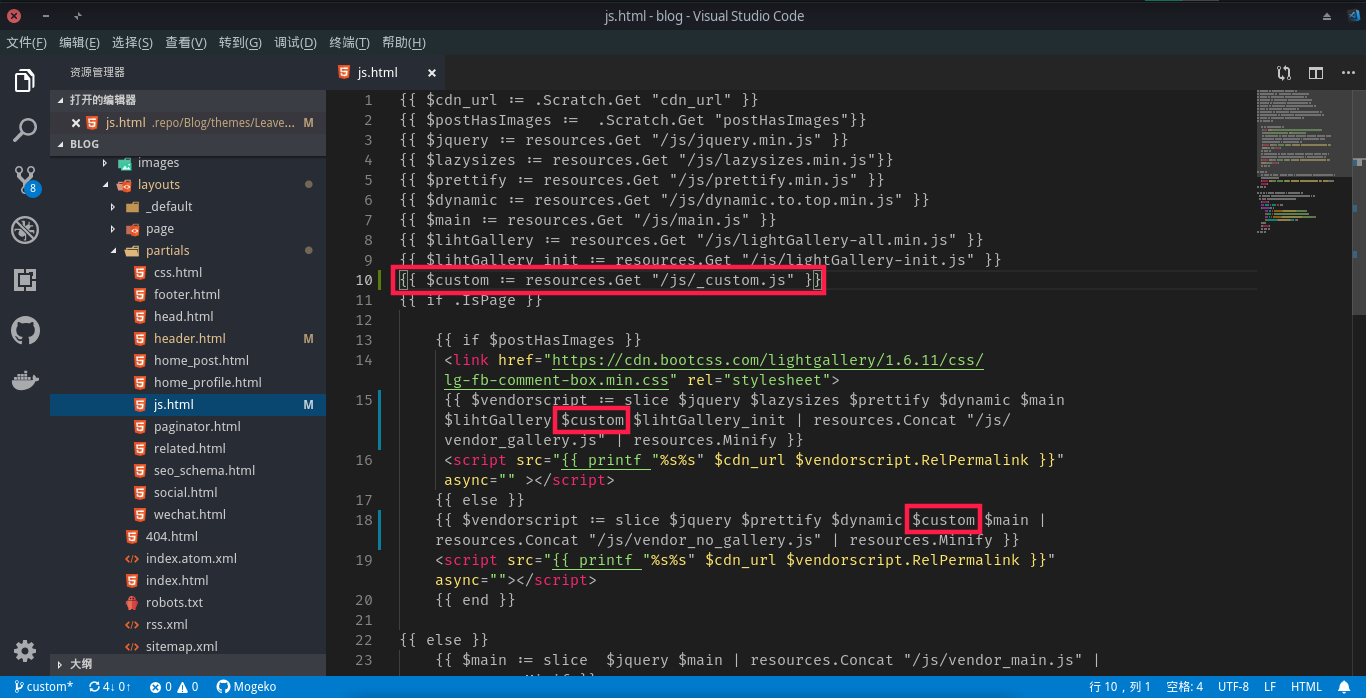
最后,使用 <script> 标签将 js 脚本引入到博客中,使其生效。
在 /layouts/partials/js.html 文件中添加以下内容,然后将 $custom 加入到变量 $vendorscript 中
{{ $custom := resources.Get "/js/_custom.js" }}
如图所示
现在用 Hugo 重新编译并部署博客,应该就可以看见阅读进度条了