Leavelt 主题优化
{{< notice info “Obsolete” >}} 本站目前使用的主题是 zzo {{< /notice >}}
目前本博客使用的 Hugo 主题是:Leavelt
正如你说看到的那样,是一款简约大气的的主题。但再使用的过程中我也发现了一些可以改进的地方
添加谈笑风生区🔗
{{< notice warning “warning” >}} Gitalk 可能存在安全问题, 建议使用 utteranc 作为代替。 {{< /notice >}}
Leavelt 默认没有评论系统,我们可以做一点简单的修改添加 Gitalk 评论系统
关于 Gitalk🔗
Gitalk 是一个基于 GitHub Issue 和 Preact 开发的评论插件。它支持多种语言 (包括 en、zh-CN、zh-TW、es-ES、fr),并自动判断当前语言。最重要的是 Gitalk 使用的是 GitHub Issue 的 api,不依赖任何第三方平台。也就是说,只要 GitHub 不倒闭,你的评论系统就不会被关闭。
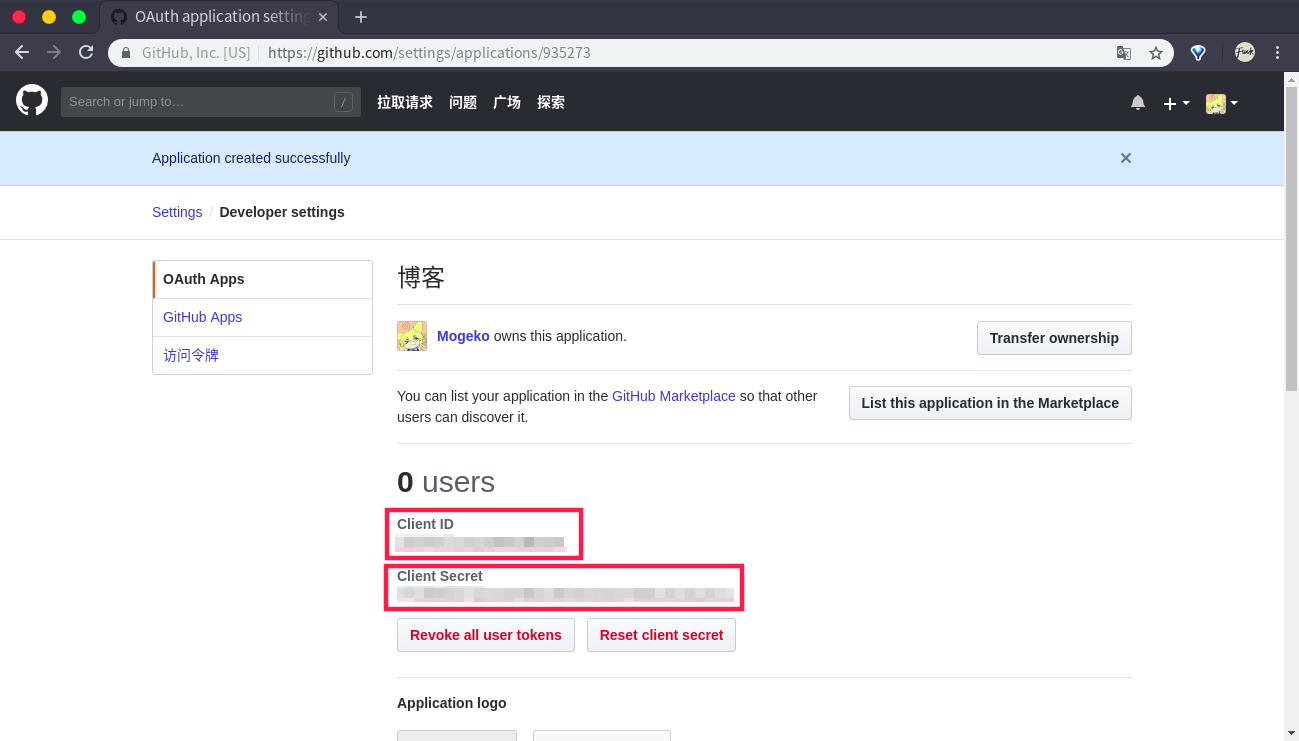
创建 GitHub Application🔗
首先要去 GitHub 上创建一个 GitHub Application

点击创建
记下 Client ID 和 Client Secret,以后要用
添加 gitalk.html 模板🔗
接下来为主题添加 gitalk.html 模板。
在主题的 layouts/partials 文件夹中创建 gitalk.html 文件,写下如下代码
{{ if .Site.Params.enableGitalk }}
<div id="gitalk-container/" style="border:0"></div>
<link
  rel="stylesheet"
  href="https://unpkg.com/gitalk/dist/gitalk.css/"
  style="border:0"
/>
<script
  src="https://unpkg.com/gitalk/dist/gitalk.min.js/"
  style="border:0"
></script>
<script>
  const gitalk = new Gitalk({
    clientID: "{{ .Site.Params.Gitalk.clientID }}",
    clientSecret: "{{ .Site.Params.Gitalk.clientSecret }}",
    repo: "{{ .Site.Params.Gitalk.repo }}",
    owner: "{{ .Site.Params.Gitalk.owner }}",
    admin: ["{{ .Site.Params.Gitalk.owner }}"],
    id: location.pathname, // Ensure uniqueness and length less than 50
    distractionFreeMode: false, // Facebook-like distraction free mode
  });
  (function () {
    if (["localhost", "127.0.0.1"].indexOf(window.location.hostname) != -1) {
      document.getElementById("gitalk-container").innerHTML =
        "Gitalk comments not available by default when the website is previewed locally.";
      return;
    }
    gitalk.render("gitalk-container");
  })();
</script>
{{ end }}
然后在 layouts/_default/single.html 中插入{{ partial "gitalk.html" . }}

配置 config.toml🔗
在 config.toml 中添加以下配置
[params]
  enableGitalk = true

[params.gitalk]
    clientID = "[Client ID]" # Your client ID
    clientSecret = "[Client Secret]" # Your client secret
    repo = "mogeko.github.io" # The repo to store comments
    owner = "Mogeko" # Your GitHub ID
    admin= "Mogeko" # Required. GitHub repository owner and collaborators. (Users who having write access to this repository)
    id= "location.pathname" # The unique id of the page.
    labels= "gitalk" # GitHub issue labels. If you used to use Gitment, you can change it
    perPage= 15 # Pagination size, with maximum 100.
    pagerDirection= "last" # Comment sorting direction, available values are 'last' and 'first'.
    createIssueManually= false # If it is 'false', it is auto to make a GitHub issue when the administrators login.
    distractionFreeMode= false # Enable hot key (cmd|ctrl + enter) submit comment.
将 [Client ID] 替换为 GitHub Application 的 Client ID
将 [Client Secret] 替换为 GitHub Application 的 Client Secret
将 repo 设置为你的博客的地址
将 owner 和 admin 设置为你的 GitHub ID
更多配置请参考:https://github.com/gitalk/gitalk
设置好后,将编译好的网站推送到 GitHub 上,不出意外的话应该就可以看见评论框了 (Gitalk 在 hugo server 中是不会启用的)## 配置 config.toml
在 config.toml 中添加以下配置
[params]
  enableGitalk = true

[params.gitalk]
    clientId = "[Client ID]" # Your client ID
    clientSecret = "[Client Secret]" # Your client secret
    repo = "mogeko.github.io" # The repo to store comments
    owner = "Mogeko" # Your GitHub ID
    admin= "Mogeko" # Required. GitHub repository owner and collaborators. (Users who having write access to this repository)
    id= "location.pathname" # The unique id of the page.
    labels= "gitalk" # GitHub issue labels. If you used to use Gitment, you can change it
    perPage= 15 # Pagination size, with maximum 100.
    pagerDirection= "last" # Comment sorting direction, available values are 'last' and 'first'.
    createIssueManually= false # If it is 'false', it is auto to make a GitHub issue when the administrators login.
    distractionFreeMode= false # Enable hot key (cmd|ctrl + enter) submit comment.
将 [Client ID] 替换为 GitHub Application 的 Client ID
将 [Client Secret] 替换为 GitHub Application 的 Client Secret
将 repo 设置为你的博客的地址
将 owner 和 admin 设置为你的 GitHub ID
更多配置请参考:https://github.com/gitalk/gitalk
设置好后,将编译好的网站推送到 GitHub 上,不出意外的话应该就可以看见评论框了 (Gitalk 在 hugo server 中是不会启用的)
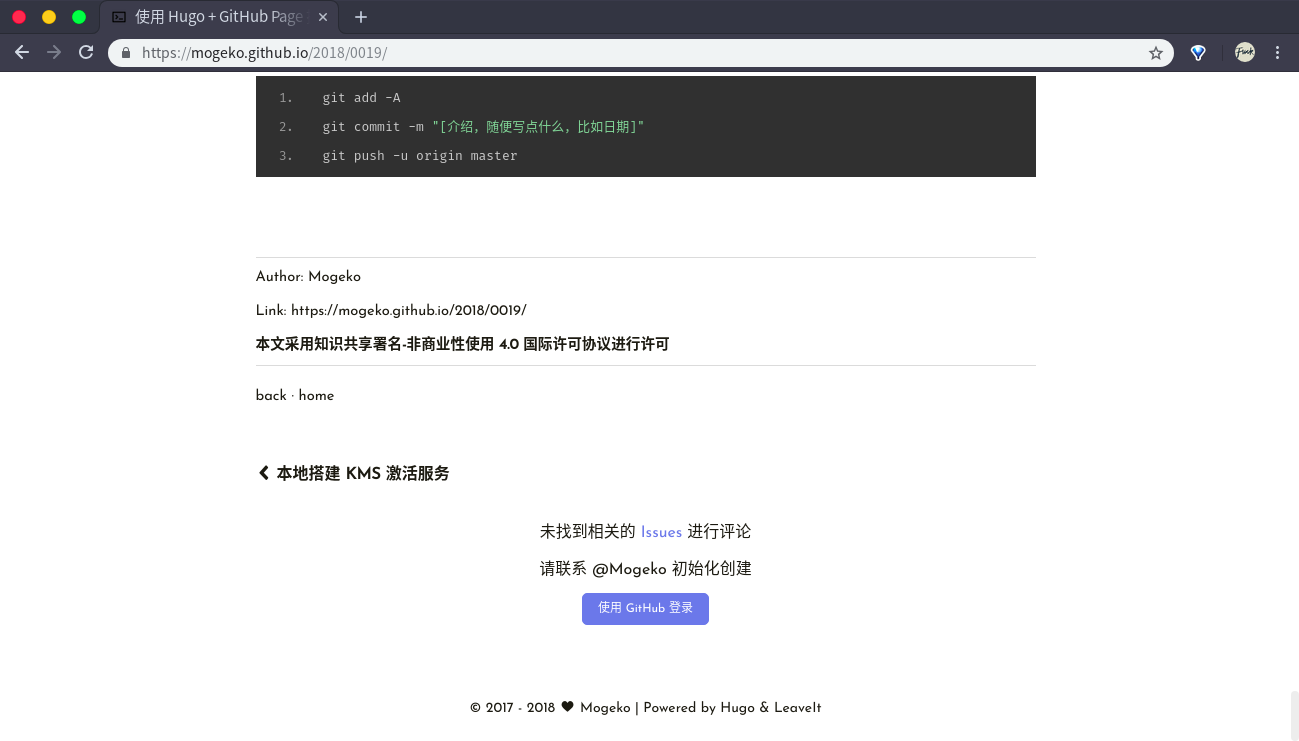
添加谈笑风生区后还不能立即使用,需要用你的 GitHub 账号登陆并初始化。每篇博客都要
添加“隐藏文字”(spoiler)🔗
Steam 和其他一些支持 BBCode 的论坛都有一种名为“隐藏文字”(spoiler) 的标签,使用这种标签后,标签中的文字默认会隐藏起来,当你将鼠标移动到文字上时,文字才会显示出来。
就像这样:{{< spoiler >}}这是一段隐藏文字{{< /spoiler >}}
很有意思😏
虽然 Markdown 并不支持“隐藏文字”,但我们可以通过在 Markdown 中内嵌 HTML 实现这一功能
安装 ruby-sass🔗
由于 Leavelt 使用了 scss。所以如果想要添加自定义样式的话需要先安装 Sass (基于 Rudy)
我使用是 Ubuntu。所以直接在终端中运行 sudo apt install ruby-sass 就可以了,计算机会自动为我解决好依赖
macOS 自带得有 Ruby,因此可以通过 gem安装
Windows 需要 下载 Ruby 的安装包安装
具体可以参考 -> 安装 Sass | Sass 中文网
添加自定义样式🔗
在 assets/css/_custom.scss 文件中添加
.spoiler {
  color: black;
  background-color: black;
}
.spoiler:hover {
  color: white;
}
然后在终端中执行
sass --style compressed [Leacelt 目录]/css/main.scss:[Leacelt 目录]/resources/_gen/assets/scss/css/main.scss_b95b077eb505d5c0aff8055eaced30ad.content
注意替换 [Leacelt 目录]
然后再在 Markdown 文件中用 class 为 spoiler 的 HTML 标签将想要“隐藏”的文字标记出来就可以了,例如
<span class="spoiler">隐藏文字</span>
{{< spoiler >}}隐藏文字{{< /spoiler >}}
放大图片🔗
默认的图片大小有点小,作者的目的应该是想让大家多使用一下 lightGallery 图片相册;不过图片小了,有时候文字看不清楚
我们可以通过修改 assets/css/_custom.scss 文件把图片弄大一些 (虽然也大不了多少)
在 assets/css/_custom.scss 中添加
.post-warp .post-content img {
  max-width: 100%;
}
然后与上面一样的编译,运行
sass --style compressed [Leacelt 目录]/css/main.scss:[Leacelt 目录]/resources/_gen/assets/scss/css/main.scss_b95b077eb505d5c0aff8055eaced30ad.content
还有一个办法就是使用 HTML 标签代替 Markdown 语法,即用 <img src=""> 标签代替 ![]()
不过这样就没法使用 lightGallery 图片相册 了
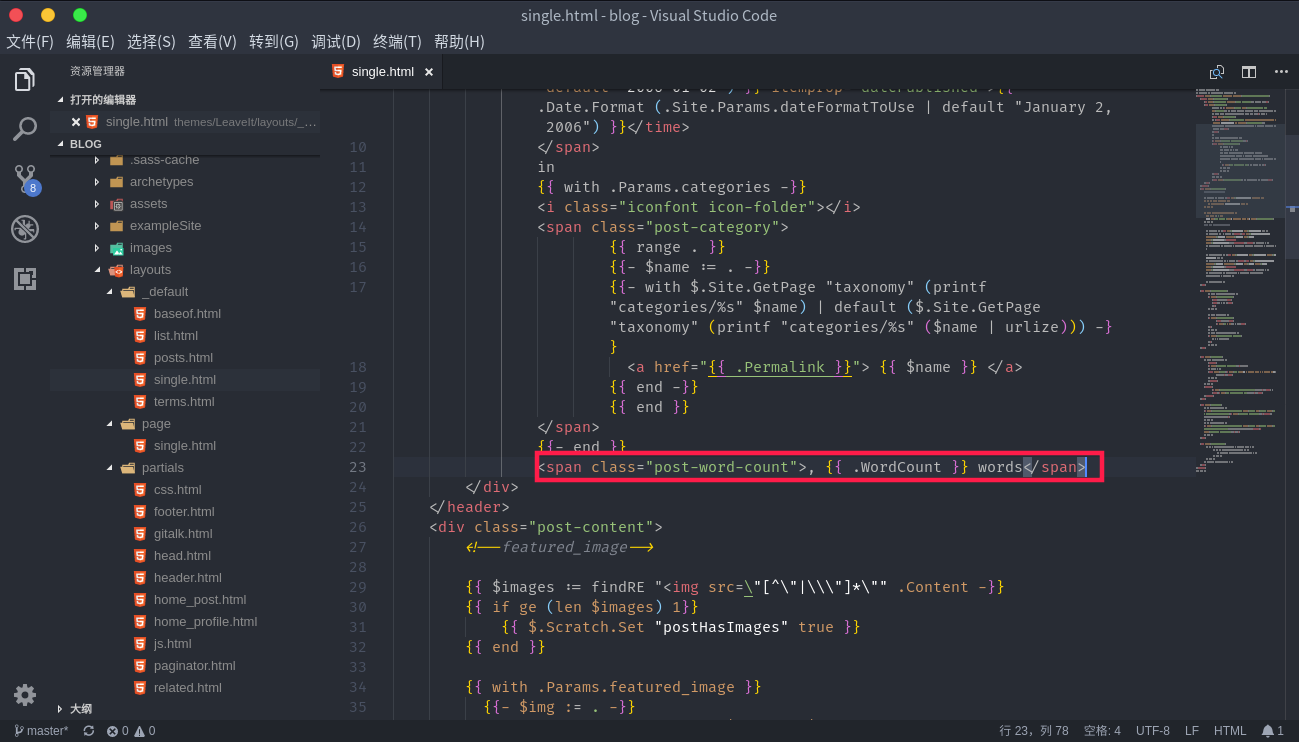
添加字数统计🔗
打开文件 layouts/_default/single.html,在 22 行后插入一行,添加以下 DOM:
<span class="post-word-count">, {{ .WordCount }} words</span>
效果:

关于添加「字数统计」的详情:为 Hugo 博客添加字数统计